Sunday, December 23, 2012

A Culinary Hug


When times are cold, warmth from the inside goes a long way to making the situation look better. Soup's just the thing, but a can of Campbell's is not the only way (or even the best way) to give yourself a culinary hug. Here's a good cold weather soup and some hearty potato bread to go along with it.

VERY VEGGIE SOUP
This recipe is a variation on a minestrone recipe by two dear lovers of history, Sandy and Mabel Formica, of Little Rock, Arkansas. The original is found in their cookbook Mediterranean Basin Cooking (Sherwood, Arkansas: Formica CO., 1997). The original calls for a chicken stock base, but I have changed it up a bit to make it vegetarian and increase the ratio of vegetables to stock and reduce the cooking time to preserver more of the vegetables' vitamins. I also eliminated the pasta called for in the original recipe, which is typical for minestrone, because I serve it with polenta dumplings that make it plenty hearty, even without the pasta.

INGREDIENTS

• 1 can diced tomatoes
• 2 tbs. olive oil
• 1 large onion, cut in half and sliced thin
• 3 carrots, sliced thin
• 2 stalks celery with the leaves, thinly sliced
• 1/2 cup celery root, chopped (or use more celery stalk)
• 3 stalks swiss chard, chopped (if you can’t find chard, substitute some fresh spinach)
• 1 zucchini, chopped
• 1 cup mixed dried beans (cook these ahead of time--garbanzos, Great northerns, kidneys, Christmas limas, cranberry beans,navy beans, pintos, etc.)*
• 4 cloves garlic cloves, minced
• 2 bay leaves
• 2 quarts vegetable broth
• 1 cup of your favorite spaghetti sauce
• Salt and pepper to taste

INSTRUCTIONS

In a heavy stock pot, fry the onion and garlic in olive oil until soft. Add the rest of the ingredients and cook until the vegetables are soft. Add salt and pepper to taste. The soup tastes better if it is made a day ahead. Pour the soup into bowls and then place a warm polenta bumpling in the center of each bowl. The recipe serves sixteen. Good served with Potato Bread Jummy!

*To cook the 1 cup of dried beans, first rinse them, then place them with 4 cups water and 1 tbs oil into a pressure cooker. Do NOT add salt! Cook for 30 minutes, and then remove from heat and allow the pressure to drop by itself (do not place the pot under water or use the button on the pressure cooker to lower the pressure rapidly—that would make the beans burst—which is ok if you are making refried beans, but not good for this recipe). Drain the bean before adding them to the vegetables. I also sometimes add black-eyed peas, but they have to be cooked separately, as they take much less cooking time than other beans. If you are in a hurry, you can add canned beans instead, but then you will not have the variety of different beans that makes this soup so interesting. One cup of dried beans yields about 2 cups cooked—so a standard can of kidney beans would be equal to the 1 cup of dried beans called for here.

POLENTA DUMPLINGS
• 2 cups water
• 1 cup milk
• 3 tablespoons butter
• 3/4 tsp salt
• 1 1/4 cups polenta
• 2 tablespoons finely chopped onions
• 1 tablespoon butter
• 2 well-beaten eggs
• 1/4 cup grated Parmasan or Grana Padano cheese
• 1/4 cup grated gouda cheese (Monteray Jack will also work)
• 1 tablespoon parsley
• Oil or clarified butter for frying

INSTRUCTIONS
In a large saucepan, combine water, milk, 3 tablespoons butter and 3/4 teaspoon salt; then bring to a boil over high heat. Slowly add polenta, stirring with a whisk. Reduce heat to medium and cook, stirring constantly, for 2 minutes. Reduce heat to very low and cook, stirring often with a wooden spoon, until polenta is thickened and tender, about 20 minutes.
Meanwhile fry finely chopped onion in 1 tablespoon butter (or more as needed) until golden. Preheat oven to 215 degrees Fahrenheit (100 degrees Celsius). Remove polenta from heat; stir in well beaten eggs, onion, cheese and parsley. Let stand until cool enough to handle, about 10 minutes. Wet hands and then form patties about 3/8” thick and 2.5” in diameter. You will need to wash your hands several times before you have finished forming all of the dumplings, otherwise things can get a little sticky. Fry the dumplings in oil or clarified butter for about 5-10 minutes per side until golden brown. Place on a baking sheet and bake for about 15 minutes more just before serving. Because the oven temperature is low, the time can be extended if necessary). If you are serving this soup to guests, it is also possible to make the dumplings ahead of time, refrigerate them, and then do the last step (the part in the oven), just before the guests arrive. Serve with Very Veggie Soup. This makes enough for 16 people.


POTATO BREAD
This is a recipe has its origins among the Pennsylvania Dutch. The only thing it has in common with the commercial breads sold under this name is just that--the name. One very good characteristic of this bread is that it does not go stale or dry out very fast. The bread rises wonderfully, especially if whole grain spelt flour is used. It is still goad when made with whole wheat flour, but the loaves are not quite as high. The recipe makes two good-sized loaves, but it can easily be cut in half if only one is needed.

INGREDIENTS

• 2 cups mashed potatoes
• 1 cake of fresh yeast (or 2 packages of rapid rise yeast)
• 1 1/4 cup warm water (120 degrees F. if using rapid rise yeast)
• 1 tablespoon brown sugar
• 2 tablespoons cooking oil (or melted butter)
• 1 cup whole grain flour (I use spelt flour, but whole wheat also works)
• 6 1/3 cups white bread flour
• 1 tablespoon salt (or less if you want to cut down on sodium)

INSTRUCTIONS

Combine mashed potatoes, yeast, water, sugar, oil, and whole grain flour. Mix on high. Then add the salt and then slowly kneed in the rest of the flour (I use the dough hook of a Kitchenaid mixer for this). Kneed for about ten minutes. Then let rise until double. Punch down and form into two round loaves. Place on greased cookie sheets which have been liberally sprinkled with corn meal. Let rise until double again. Cover with foil before putting into the oven. Bake as follows:
• 15 minutes at 450 degrees Fahrenheit, then
• 15 minutes at 400 degrees, then
• remove foil and bake for a final 15 minutes at 375 degrees.

Monday, January 2, 2012

Classic Apple Pie

Nothing tastes better on a cold winter's day than a good pie--at least in my book. There is no need to buy ready-made pie crust for this pleasure--a perfect crust is no harder to make than most other basic recipes. I made this pie today, because my nieces and nephews were coming to visit, and they have become very avid fans of American Apple Pie. It also provided a chance to use up some of the last apples harvested during the fall from the tree in our backyard. It is a mystery variety that tastes like cardboard when eaten right from the tree, but which improves immensely in flavor after a couple of months in the cellar.

Here is the recipe for a 1.5 crust pie (see the picture). Fruit pies are normally made with a full top crust, but then you have to cut holes in the crust to allow steam to escape. Using a 1.5 crust pie cuts a few calories off, without making the pie any less yummy.

PIE DOUGH:
1 1/2 cup flour
1/2 cup fat*
pinch of salt
1/4 water

(*for the fat I use a 1/4 cup lard, 2 tablespoons of butter and 2 tablespoons of vegetable shortening, but 1/4 cup each of butter and vegetable shortening also works fine if you are not into pig fat)

Sprinkle the salt over the flour and then cut the shortening into the flour using a pastry blender until clumps of about a eigth of an inch remain. You get better results if the fat is cold--straight from the fridge. Then mix in the water and form into a ball.

Spread a wooden board with a heavy dusting of flour and roll out the dough until it is about 13 inches in diameter. Use the roling pint to transfer the dough into a 9" pie plate. Cut the dough so that it extends over the edge of the pie plate by about 3/4 of an inch, saving the excess. Tuck the part of the dough that extends over the edge in, so that the seam is hidden between the pie plate and the crust. Then flute the edge of the crust with your fingers.

Form a ball with the excess dough, flour the board again and roll it out again . Using a saucer or bowl of about 6.5 inches or so as a pattern, cut out a smooth circle of dough. Set aside until you have finished making the filling.

FILLING:

5 cups of thinly sliced apples (See below for which kinds are best)
1 teaspoon lemon juice
3 tablespoons of flour
3/4 cup sugar
1/2 teaspoon cinnamon
1/4 teaspoon nutmeg
pinch of salt
2 tablespoons of butter cut into small pieces

Sprinkle the lemon juice over the apples. Then mix the flour, salt and spices together and mix with the apples. Turn the mixture into the dough-lined pie plate. Arrange the apples slices so that the outside edge has a daisy-like appearance (see the picture). Add the butter to the center of the pie, then place the remaining circle of crust on top in the center. Sprinkle a little sugar over the top crust. It helps to place some aluminum foil (or a pie ring) around the edges of the pie to keep them from getting too dark. Bake at 425 degrees for about 40 minutes or until the crust is golden.

A DISSERTATION ON APPLE VARIETIES FOR PIE: A general rule of thumb is that a good tart apple makes a good pie. Good varieties for pies are Cortlands, Empires, Granny Smiths, Jonathans, Spys and Winesaps. Golden Delicious and Galas are also suitable for pies, but they are relatively sweet, so are best when mixed with tarter varieties. Red Delicious, McIntoshes and Fujis are not as good for pies, because they either tend to become mushy when baked or are not tart enough, though in a pinch they make a better pie than no pie at all.

Friday, December 23, 2011

Easy, Gorgeous, Impress-Your-Friends Bread

Maybe I am the last person to hop on the no-knead bread train, but now that I am on the train, I am ON it. Over the last couple of months, this has become a weekly tradition. I mean, look at it:


It's beautiful. The magic of the no-knead loaf is its soft, substantial inner crumb and crunchy crusty outer shell. Oh, and also the fact that it is crazy easy.

No-Knead Bread
This is essentially the recipe from smitten kitchen (lightly adapted) via Mark Bittman at New York Times

Yields one 1 1/2 pound loaf

3 cups all-purpose or bread flour, more for dusting (I'm a big fan of bread flour for the dough and regular for sprinkling--bread flour has a higher gluten content, so it makes a nice texture)
1/3  teaspoon active dry yeast (or 1/4 teaspoon instant yeast)
1 1/4 teaspoons regular salt
sea salt for sprinkling

1. In a your trusty KitchenAid (or a large bowl), combine flour, yeast and regular salt. Add 1 1/2 cups water or so in small portions while stirring; you want the dough to be "shaggy," also known as still sticking to the sides of the bowl. It will look too wet. You will want to add more flour. Stop yourself. Trust. Cover your bowl with plastic wrap and step back for a long while: 12 hours is recommended, but I've gotten away with 10 or so. The dough should be in a warm spot (70 degrees or so). I like to leave mine on top of the oven, but your mileage may vary.

2. The dough is ready when the top is covered in little bubbles. Lightly flour your counter and dump out the dough. You'll need a flexible spatula for that maneuver. Sprinkle a little more flour on the dough and fold it over on itself once or twice. Don't do this too much--you want to keep those air bubbles that you saw on the surface as intact as you can manage. Cover loosely with plastic wrap (like perhaps that piece you just took off the bowl?) and let rest about 15 minutes.

3. Get your hands floury and dust up the dough lump a bit, and then shape it into a ball. Enthusiastically rub flour into a cotton towel (not terry cloth--I use an old cut-up t-shirt) with flour, and then sprinkle it with sea salt; put dough seam side down on towel and dust with more flour. Cover with another be-floured cotton towel and let rise for about 2 hours. When it is ready, dough will be more than double in size and will not readily spring back when poked with a finger.

4. Half an hour before the dough is ready, turn on your oven at 450°F. Put a 6- to 8-quart heavy covered pot (cast iron, enamel, Pyrex or ceramic) in oven as it heats; I like to put it on a baking sheet to make it easy to remove. I use a casserole dish and a Pyrex lid that really don't go together, but they fit--sort of. I prefer the 6-quart size because it means the loaf is a little taller and you get a nice big slice out of it. Whatever you use, make sure it has straight sides and no lip or you won't be able to get the loaf out. When dough is ready, carefully remove pot from oven (preferably on a baking sheet). Pick the dough up using the towel and tump dough over into pot, seam side up; it will likely look messy, but all that will turn into gorgeous craggy goodness. It's a rustic loaf; be zen about it.

5. Lid up and bake 30 minutes, then remove lid and bake another 15 to 30 minutes, until loaf is golden brown & delicious. Cool on a rack, if you can stand it.

Wednesday, December 14, 2011

Hot Drinks for Cold Times

Now that winter is upon us again, it seemed like a good time to spread some warmth in the form of another posting. This time it comes not from Anna, but from Jim, her dad. I'm glad to be joining Anna in this endeavor, as we share a love of cooking. Because I live in Austria, I'll also be bringing some recipes from my adopted homeland to these pages.

The first one is one of Jenn's favorites--a drink consumed in great quantities at this time of year in Austria, preferably outside at an Advent Market stand with lots of good pre-Christmas spirit. Anna will be bringing another, closely related favorite in a couple of weeks. This will tide you over until then.

Glühwein (Literally, Glow Wine--A wine that will put a glow on your cheeks)

2 bottles of good red wine (Cabernet Sauvignon or Pinot noir works well)
1 organic orange

1 organic lemon

1 cinnamon stick

1 vanilla bean
1 star anise

2 whole cloves

2/3 cup sugar

Slice the orange and lemon into 1/4 inch slices. Add the rest of the ingredients and warm uncovered until just below the boiling point before serving. Although it might seem more efficient to cover the pot while warming, leaving the cover off has the advantage of spreading the wonderful smell throughout the house.

It is helpful to have a small strainer handy to strain the wine as you ladle it into mugs before serving. Do not skimp on the quality of the wine. Just because it is warmed and doctored up with sugar and spices does not mean you can't taste the difference between a bad wine and a good one in this recipe.

And for those of you who do not handle alcohol well, here is one that will wet your whistle without making you tipsy:

Hot Mulled Cider

2 quarts of cider (apple juice will do in a pinch, but cider tastes better)
1 tablespoon fresh lemon juice
2 cinnamon sticks
3 whole cloves
1 organic lemon, cut in thin slices
1 tablespoon brown sugar
pinch of ground nutmeg

Mix all ingredients and boil for 5 minutes. Reduce the temperature and simmer for 10 minutes more. Keep warm on low heat until serving or transfer to a punch bowl heated with a tea light. Makes 8 cups. And if it just doesn't do it for you without a little rush, you can add 1/2 cup of good quality rum as it simmers.

Sunday, April 3, 2011

Pink Perfection: a cocktail for spring

I've been away, hiding in my cave waiting for winter to finally pass, and it looks like it might actually be over. Today is windy and cloudy, but in the 60s. I might even manage to get work done in the garden! Shocking.

I've been keeping alive in my over-winter cave through the use of comfort foods and cocktails. This winter's new discovery, the Greyhound, was very good at reminding me during the darkest days that early spring was on its way. I have The Kitchn to thank for introducing me to this potion of excellence. Delicate, simple, and pretty, the Greyhound uses fresh grapefruit, which this is the best season for, and vodka to make pale pink perfection.

Besides, freshly squeezed grapefruit juice has some sort of magical property that makes it probably the most refreshing thing you have put in your mouth. Get into it.

Greyhound

Fresh squeezed = madly superior to store bought. Don't even go there.

This will make two cocktails.

Ingredients:
Vodka
1 grapefruit
Ice

Tools:
Hand juicer
Jigger

Get two old fashioned glasses and put 3-4 ice cubes in each, or, if you are super fancy, an ice sphere. Set aside. Cut your grapefruit in half and juice the first half. Pour this juice into the first glass. Squeeze the second half & pour into the second glass. Pour one jigger (mine is 4cl) of vodka into each glass. Stir, sip, sigh.

Variation: the Salty Dog.

Before adding the wet works, salt the rim of each glass.

Friday, January 28, 2011

Healthy + Easy + Pretty = Magic

Have I mentioned that I am over winter? So thoroughly over it. I'm at that dreary doldrums stage where whining about your low productivity levels is followed by wallowing on the couch. The stage where you briefly think that indeed, drinking smoothies that are green will become a daily practice, and also morning exercise! Exercise and green smoothies! And then you make one green smoothie and it really isn't very good, and then you hit the snooze button four times before you realize the alarm has been going off. That stage. You know the one, don't pretend.

Anyway, it is at this time, the winteriest of winter times, that I must have colorful, clean food to keep me feeling human. And not colorful in a green-smoothie-resembling-Swamp-Thing kind of way (no offense to green smoothies--I'll figure out how to make them delicious eventually). The other night, I had a craving for something bright, crisp and simple that I could throw together fast. I was cooking for myself, so if you want to share this with someone else, just double it. Or, if you don't want just this for dinner like I did, this could do for two side dishes. There are no magical chemical reactions going on here--it's not like baking--so just adjust levels however you see fit.

Carrot-Ginger Salad with Avocado


2 carrots, big-ish
2 tablespoons rice wine vinegar
tablespoon or so of grated fresh ginger (depending on how spicy you like it)
dollop of honey (about a teaspoon and a half)
1 avocado cut up

1. Ribbon your carrots. Peel them first and keep using the peeler to strip off big noodles of carrot flesh. If you haven't done this before, here's a video of some lady ribboning a zucchini--same concept.

2. Toss your carrot noodles in the vinegar, ginger, honey. Let sit for 5 minutes or so while you cut up the avocado. Here's a fancy way to do that--I just halve mine, skin them, and cut them. Messy fingers? Sure. Do I care? Not a whit.

3. Nom.

This is pretty much amazing, I have to say. Now I'm craving it again. Next grocery run: more avocado.

Friday, January 21, 2011

Invasion of the Gadgets

This Christmas was the Year of the Gadgets. When the dust settled, our kitchen had acquired a pressure cooker, ice cream maker, bread machine, and wine making kit. We also received what appeared to be an electric knife which I then regifted without first looking in the box--oops! Luckily that was to Wife's mom, who thought it was funny.

Anyway. With all of these new contraptions around, I've been having a series of minor failures in the kitchen lately. The bread I made had a mushroom top that collapsed. I've made some amazing ice cream, but also some not-so-good ice cream. But I have repeatedly tried and failed to get a handle on this pressure cooker thing.

The shiny menace!
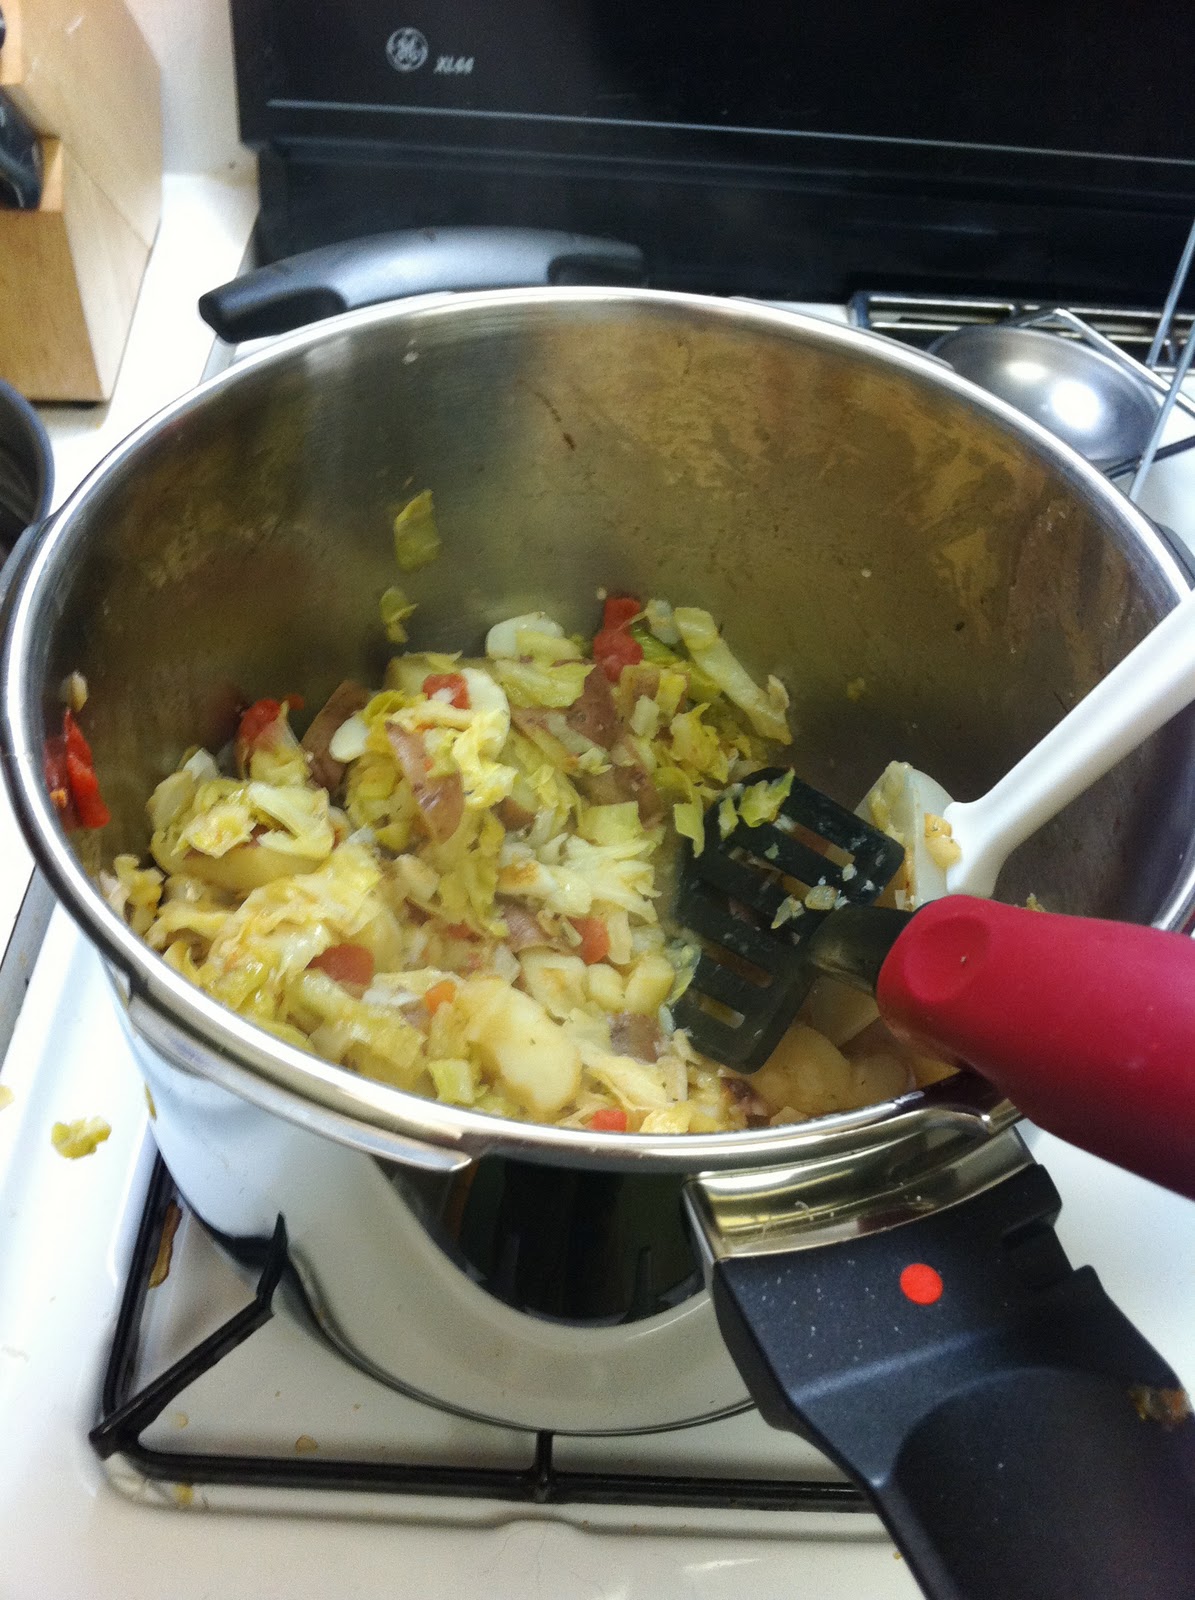
I have successfully used it to cook potatoes, but that's been the long and short of it. When I've tried to use it to actually prepare a dish, I've ended up with something soggy and not at all appetizing.

Norwegian Surprise: as delicious as it sounds.
So, dear reader, I am asking you for assistance! Do you have a pressure cooker? Do you have a recipe you always like to make with it? I'm all ears!

I know there is the potential for deliciousness in here.

Thursday, December 30, 2010

A Bowlful of Festive

Alright, I've got to get this recipe to you stat, as a) it's crazy delicious and b) it's seasonal and since we are post-Consumermas, is probably already out of date. Also, I'm a little embarrassed to share this, as I do feel it's kind of cheating since the main ingredient is pre-made eggnog. Don't worry--I'm not going to go all Semi-Homemade kwanzaa cake on you, I promise. Just trust that this is stupid easy and ridiculously tasty, and I don't even particularly like eggnog. If you wanted to make your own eggnog not only would this recipe work with it, I would also tip my hat to you.

Eggnog Ice Cream


Adapted from Sherlie's Easy Eggnog Ice Cream at Allrecipes

Mr. Monster approves this recipe.
2 cups eggnog
1 cup heavy whipping cream
1 cup milk
1 tablespoon dark rum

Mix up the goods and pour into the frozen container of an ice cream maker. Follow its directions. Mine took 50 minutes to firm up to soft serve consistency, but you know your own ice cream maker better than I. Eat a little of it now and put the rest of it in a container in the fridge to firm up properly (it will take about 2 hours).

Tuesday, December 21, 2010

A Winter Pick-Me-Up with the Power of Color

Winter food can get a little... well, boring, especially if your diet is heavy on the produce like mine is. How many ways can a person cook potatoes, anyway? Squash are the tiny splashes of color that keep my winter cooking from ending up monochrome and snooze-inducing. A little scene-stealer of a dish like this one can keep your meals feeing festive and interesting even when you've got, say, several inches of snow on the ground like we do here. Plus, a vegetarian dish that can stand as the beautiful centerpiece of a meal is a rare and wondrous thing (you know where I'm coming from, fellow veggies and almost-veggies: a plate of sides does not a meal make). These babies spend a long time in the oven, so they're best suited to a day when you can commit several hours to kicking around the kitchen--like an upcoming holiday, perhaps.


Roasted Acorn Squash with Corn Pudding

Adapted from Heidi Swanson's recipe at 101Cookbooks

The original recipe only called for 1 acorn squash, but I found that I had way too much filling. Either you can use two squashes (as I suggest here) or you can use one squash and cook the remainder of the filling like a custard. I did mine in an ungreased souffle pan, placed it in a cake pan full of water, and put the whole shebang into a cold oven. I then let it heat up to 375 and baked for 40 minutes. It was okay, but a little bland for me. The combination of egg and squash is what makes this dish stellar.


2 acorn squash (see note above)
1 tablespoon olive oil
1 cup milk
1 egg and 2 egg whites
1/2 cup corn kernels (I used frozen, thawed but fresh would be great too)
1/4 teaspoon allspice
1/3 cup chopped scallions
pinch of nutmeg
1/2 teaspoon salt
1/3 cup grated cheddar
Mise en place: the finest kitchen methodology!
Preheat oven to 375F degrees with your rack in the middle.

Cut your squash in half lengthwise to make nice little cups and scrape them out with a spoon. Then cut a flat spot on the bottom so that the cup sits level. You want to have a nice level container for your filling so there's no slopping about. Rub the top and inside of your squash with the olive oil and put them cup-side up on a baking sheet. Cover with foil and bake for 40 minutes until the squash starts to get tender.

Whisk your eggs together with the milk, allspice, corn, nutmeg, salt, and about half to 2/3 of the scallions. Please note that the corn will sink, especially if you use frozen, and everything else will float. Give it a good stir right before pouring it into the squash, filling them about 3/4 of the way. Just leave the squash on the same baking sheet to save yourself the trouble of moving a mostly full squash cup from one surface to another. The original recipe says it can take as little time as 30 minutes, depending on the oven, but I was using my mom's nice new oven (thanks Mom!) and my pudding took nearly an hour and a quarter to set--so proceed with patience!

When the pudding looks done, sprinkle on your cheese and put the squash back in the oven for another 5 minutes. If you're feeling fancy, you can also melt the cheese by putting the squash under a hot broiler for a quick crisp--just be careful not to burn anything. Sprinkle your remaining scallions on top and tuck in!

Look at this spread and try to feel dreary. I dare ya.

Sunday, December 12, 2010

Notable Potables: Brugge Brasserie's Thunder Monkey

When I think of a winter beer, I tend to imagine molasses with a head of foam: something thick, viscous, and chewy that likely counts, calorie-wise, as the entirety of my meal. The holidays are my favorite time for beer for precisely this reason, since for about three months brewers suddenly remember that people really do like dark brews. Brugge Brasserie, Indianapolis' temple to Belgium, offers a holiday beer by the name of Thunder Monkey that is anything but the heavy, rich variety of winter beer that I know and love, but to be honest, I kind of dig it anyway.

I failed to take a photo so you will just have to use your imaginations, cats & kittens. This brew is about the color of a good bourbon, lightly effervescent, and light in the head department. Coriander and cinnamon are the first notes I got in a sip, with a little anise and hops bite at the end. The beer is very light, so the flavor is gone as soon as you've sensed it, making this a fabulous beer to drink with dinner: no fighting between flavors. Now if you hear "cinnamon" and "holiday beer" and fear you're going to have a swig full of Essence of Christmas Febreze, don't panic. If the brewers had messed with any bourbon barrel aging or cloying vanilla notes or even yeastiness, maybe. Nothing of the sort here. In fact, I'd like this brew as well in autumn as I do in winter. It's great with crepes & frites, but I bet it'd be killer with an apple and cheese plate.

The bad news? This stuff is only available in Indianapolis, and is a rare occurrence on Brugge's menu. If you happen to be there and it's on tap, go for it. Hoosier Beer Geek gave Thunder Monkey 3.96 mugs back in 2007, but their review sounds like an entirely different beer, so I imagine it's undergone some revisions between then and now. I strongly recommend the current version--that is, if you manage to snag some.

Tuesday, November 30, 2010

Magical White Trees: The Tale of Unloved Veg

I have an admission to make, gentle reader.

I have never liked cauliflower.

There, I said it. Will I lose my food blogging license? It doesn't matter: the truth must out. I can do broccoli, fine, but cauliflower has always seemed too... sulfur-y. There has always been something to cauliflower that reminded me of hard-boiled eggs, which also are not too dear to my heart. Besides, every way I have had it cooked, it is either stalky and tough or a complete mush-fest. Not, as Saint Alton would say, good eats.

But cauliflower is such a winter staple, and as a vegetarian I feel a certain duty to actually try different vegetables from time to time (I can't eat peas in everything, Wife will remind me), so I decided that I should figure out how to make cauliflower delicious. Did I succeed? Well, no one was more shocked than I when yesterday in the grocery store, I made a beeline for the cauliflower and popped a head of it in the cart. Gleefully, I might add.

Don't believe me? I dare you to try this and not want seconds. Go ahead. Try it.

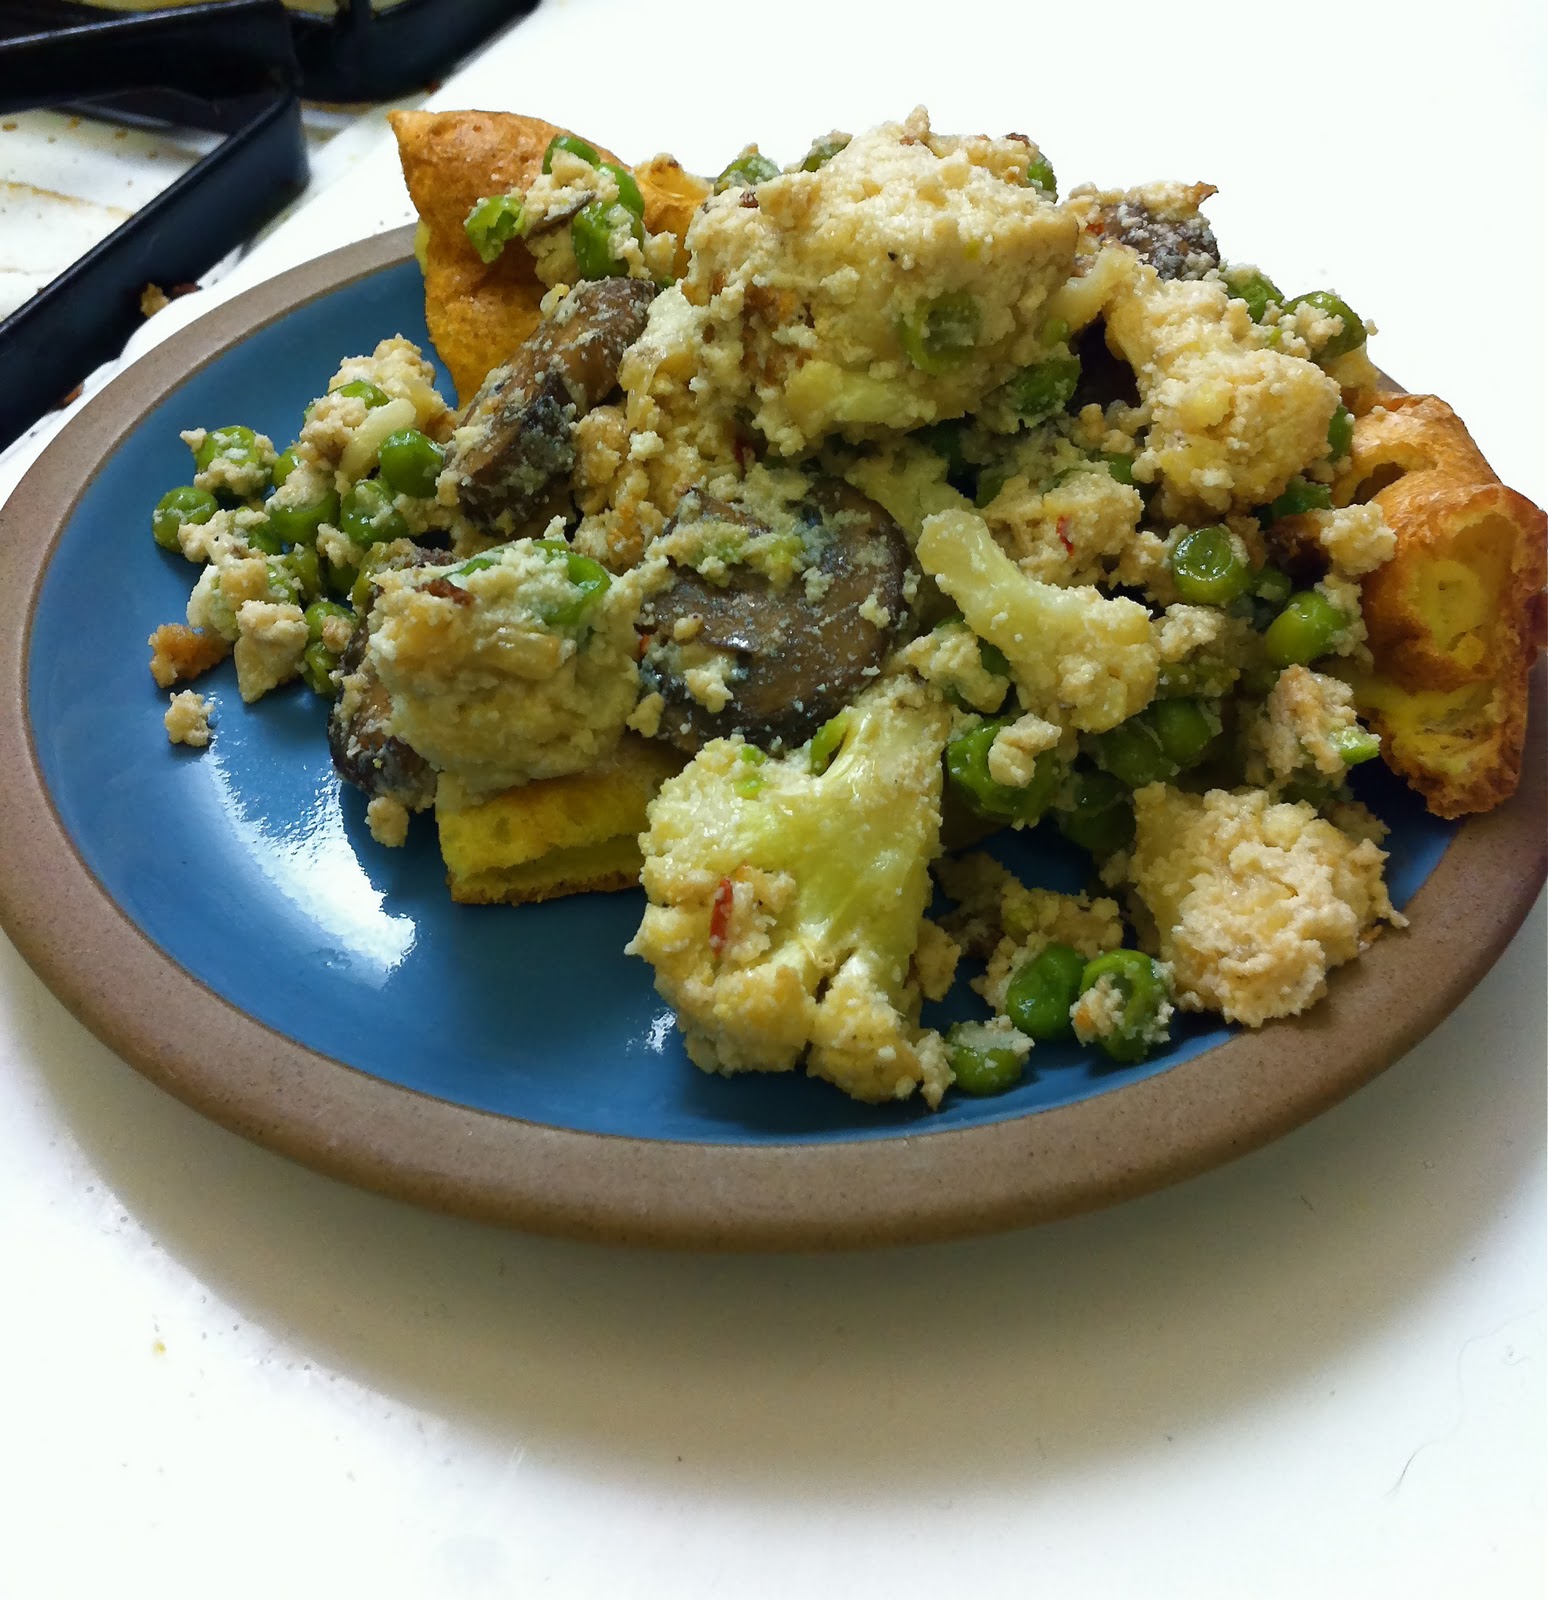
Roasted Cauliflower with Ricotta and Peas
Inspired by cauliflower 'pasta' with peas and ricotta by Jules at Stonesoup.


Shown here on top of some puffy pancake, but it's just as good on its own.


1 head cauliflower, cut like so
1 TB olive oil
2 clove garlic, minced
pinch of red pepper flakes
1/2 onion, minced
2 cups frozen peas, thawed (if you don't share my enthusiasm for peas, you can reduce or eliminate this)
2 cups ricotta
1 cup or so parmesan, shredded

1. Cut up your cauliflower all neat-like and saute in the olive oil in a nice big pan until they soften.
2. Add the garlic, red pepper flakes, onion, and peas to the party. Saute on medium-high until brown and tender.
3. Kill the heat but leave on the burner and add the ricotta. It will take a little convincing to stir through, but it'll behave once it's heated through.
4. Taste, season, and add the parmesan to your liking.
5. Devour. If you included the peas--congratulations. You've just had two servings of veg. MAGIC.

Tuesday, November 16, 2010

Canning Adventures: Marmalade!

This is the first year I have ever canned and I am officially smitten. I am an utter cheapskate, so the opportunity to preserve goods in the hand for later is irresistible. Besides, glowing color in glass in rows and rows on my shelves is never a bad thing. And there's the whole mad-scientist-in-the-kitchen thing.


Anyway.


Since the garden is officially sad-looking, canning adventures have moved from fresh produce to preserves. My first jammy experiment: marmalade!


Bitter, citrusy, and perfect on the sort of tasty baked goods that are just around the corner this time of year (or already in your kitchen, if you're like me). I used an Ina Garten recipe that (appropriately) is called Anna's Orange Marmalade. I used more oranges than she called for, but that was because my oranges were medium, not large.


Anna's Orange Marmalade
adapted from Ina Garten, original here


Ingredients:
4 large oranges (or 6 medium, in my case)
2 lemons
8 cups of sugar
8 cups of water
patience (you will have to wait 24 hours between prep & cooking)


1. Cut oranges & lemons in half, very thinly. Do you have a mandoline? Bully for you. The rest of us, cut very thinly. Pitch the seeds, save the juice. Using one of those bendy cutting mats is helpful.


2. Put all your citrusy goodness in a big stainless steel pot with the 8 cups of water. Bring it to a boil and add the sugar. 


3. Once the sugar is all incorporated, cut the heat, cover it, and let it sit overnight.


4. So, the next day, you might think "ah! I've waited long enough!" But you would be wrong. Bring it to a boil again, reduce the heat, and let it simmer uncovered for 2 hours.


5. Give it a stir and bring the heat up to medium. Boil for another 30 minutes. Skim off foam that collects on the top. You want the mixture to hit 220 degrees Fahrenheit.


6. Don't trust your thermometer? Chill a plate in the fridge and, once it's cold, put a spoonful of marmalade on it and pop it back in the fridge. Once it's cool, it should be firm, but not as hard as you think it ought to be.


7. Can it! Ladle the marmalade into your sterilized jars, lid 'em, and process in a hot water bath for 5-8 minutes. They'll keep a year.


Note: this is bitter, bitter stuff. I like it that way, but if you wanted a less bitter product, try putting in only half of the peels.

Thursday, November 11, 2010

Egg Yolk Alchemy

The other evening I found myself in a bit of a pickle: I'd made my favorite go-to egg dish, the puffy pancake (more on that another day), which calls for two whole eggs and two egg whites.


As a woman who hates to throw anything away (and has recently started buying more expensive eggs), I was left with two yolks and a determination not to toss them. I knew I had to have a culinary gold mine on my hands. So off I went to my second-favorite cook book: Google.


Within a few minutes of clicking about, I found not only did I indeed have a culinary gold mine, I had an Anglophile's culinary gold mine. With very little effort, I could turn these egg yolks and a few other bits and bobs into lemon curd.


Let it be known that I am crazy for lemon curd. I think it is best served on a spoon, headed rapidly for my mouth, but on a finger will suffice. I have never actually bought any to keep around the house because it seemed kind of frivolous. Now that I know it is this quick and simple, AND that it uses up leftover ingredients from other dishes, I'm unlikely to ever be without.


Quick Lemon Curd

My recipe is adapted from the one I found at My Kind of Food. I tweaked it since I had fewer egg yolks and no limes lying about.


Ingredients:
2 egg yolks
1 1/2 lemons, juiced (do yourself a favor and don't cheat with the bottled stuff)
sugar to taste (4 tbsp did me, but I like very tart curd)
4 tbsp butter, separated

1. Start a pot of water boiling. Once it's there, pop a metal mixing bowl of the top of it. Don't put the bowl on and wait for the boil to start--you'll cook the egg with that hot bowl. 

2. Are you ready to whisk? Here it comes. Put your lemon juice in first (again, cooling that bowl) and start whisking. Add your yolks, still whisking. Once that's incorporated, add sugar to taste. Do not stop whisking while you taste for sweetness--you'll regret it.

3. Add your butter 1 tbsp at a time, still whisking.

4. Your curd should now coat the back of a spoon easily. It'll still seem thinner than what you may have had out of a jar before, but a session in the chill chest will firm it up. Take your bowl off of the pot, still whisking. You can stop whisking when the bowl is cool enough to touch.

5. Pour into a clean container and pop it in the fridge (after eating several spoonfuls for quality control purposes).

IF you can keep yourself from eating it all right away, this should keep a week or so in the fridge. I dare you to make it last that long.

Lemon curd, whipped cream, & puffy pancake: breakfast of champions.